Owner's Manual
About superOS-808
superOS-808 is replacement firmware for the TR-808. It runs on a CPU board that plugs into the socket of the original processor and drives the same keys, step LEDs and trigger lines. The drum voices are untouched, so the machine sounds exactly as before.
The original way of working is kept: 32 patterns, 1st and 2nd Part, Pre-Scale, Tap, Intro and Fill In, Auto Fill In and rhythm tracks behave as on a stock machine. START/STOP, TAP and the FILL IN pedal keep their normal jobs in every mode.
On top of that, superOS-808 adds patterns up to 64 steps, swing, step probability, ratchets, per-voice length, direction and pre-scale, polymeter, mutes, reslice, an arpeggiator, pattern generators, MIDI in and out over the MIDI jacks and USB-C, and a web editor.
All of the new functions are reached from one key: CLEAR. Press it and the step LEDs show a map of tools; press a step to pick one.
Two Editions
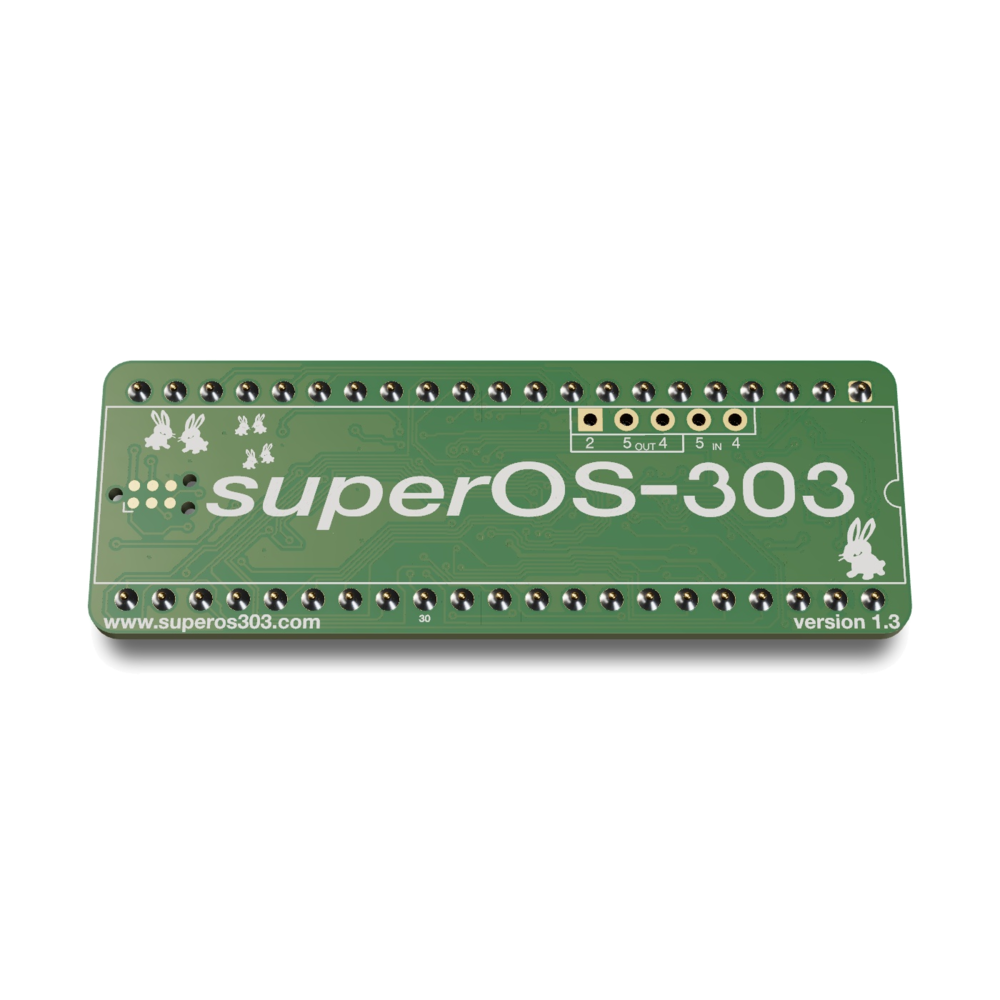
The FRAM Edition runs on the SuperOS CPU board v1.3, which stores patterns in FRAM memory. The Standard Edition runs on other compatible CPU boards and stores patterns in the processor's own flash memory. Both editions play and edit identically; the only difference is where your data is kept (see Pattern Storage).
Panel and Conventions
How Controls Are Written
Keys appear as they are printed on the panel: the sixteen STEP keys (numbered 1 to 16 from the left), START/STOP, TAP and CLEAR (the key marked Pattern Clear / Track Clear / Step Number). CLEAR + STEP 4 means: hold CLEAR, then press STEP 4. A tap is a short press and release.
Mode Dial
| Position | What it does |
|---|---|
| PATTERN CLEAR | Erase patterns; hold CLEAR while running to erase hits as they play |
| 1ST PART | Write a pattern, steps 1–16 |
| 2ND PART | Write a pattern, steps 17–32 |
| MANUAL PLAY | Play patterns; the STEP keys select them |
| PLAY | Play a rhythm track |
| COMPOSE | Record or edit a rhythm track |
Turning the Mode Dial always returns you to that position's normal function and closes any open tool.
Instrument Select
Twelve positions: the accent track and the eleven voices. In PLAY and COMPOSE the same dial picks rhythm track 1–12.
| Position | Instrument | Position | Instrument |
|---|---|---|---|
| AC | Accent | RS | Rim Shot / Claves |
| BD | Bass Drum | CP | Hand Clap / Maracas |
| SD | Snare Drum | CB | Cowbell |
| LT | Low Tom / Low Conga | CY | Cymbal |
| MT | Mid Tom / Mid Conga | OH | Open Hi-Hat |
| HT | High Tom / High Conga | CH | Closed Hi-Hat |
Other Dials
- Basic Variation (A, AB, B): which memory of the pattern plays. AB alternates A and B every measure.
- Intro/Fill Variation (A, B): which memory of the intro or fill plays.
- Auto Fill In (Manual, 16, 12, 8, 4, 2): plays a fill automatically every so many measures.
- Pre-Scale (1–4): how many steps make a beat.
- Tempo: the internal tempo, unless MIDI clock or DIN sync is driving.
Selecting and Playing Patterns
Mode Dial at MANUAL PLAY
There are sixteen pattern slots, one per STEP key. STEP 1–12 are the basic rhythms and STEP 13–16 are the intro / fill in patterns. Every slot has two memories, A and B, so there are 32 patterns in all.
- Press a STEP key from 1 to 12 to select a basic rhythm.
- Set Basic Variation to A, B or AB.
- Press START/STOP. The selected slot's LED flashes on the beat.
Selecting another rhythm while running changes it at the end of the measure. If you press during the first beat of a measure, the change happens in that measure, heard from the second beat. The pattern you select here is also the one you edit in 1ST PART and 2ND PART.
The selected rhythm plays and loops until you stop it.
Writing a Pattern
Mode Dial at 1ST PART or 2ND PART, running or stopped
In the write positions the STEP keys enter hits for the instrument on Instrument Select. A lit LED is a hit. 1ST PART shows steps 1–16 and 2ND PART shows steps 17–32. With Basic Variation on A or B you choose which memory you are writing.
| Operation | Result | Notes | |
|---|---|---|---|
| 1 | Mode Dial to MANUAL PLAY, press STEP 1, Basic Variation to A. | Slot 1 A is selected. | |
| 2 | Mode Dial to 1ST PART. | The LEDs show slot 1 A's hits for the selected instrument. | A new pattern is empty, 16 steps long. |
| 3 | Instrument Select to BD. Press STEP 1, 5, 9 and 13. | Those LEDs light. | Press a lit step again to remove it. |
| 4 | Instrument Select to SD. Press STEP 5 and 13. | The snare hits light. | The LEDs always show the selected instrument only. |
| 5 | Press START/STOP. | The pattern plays. The playing step's LED flicks on or off as it passes. | You can keep writing while it runs. |
One complete pattern is now written.
- Steps past the part's step number stay dark and do not respond.
- Steps past the selected voice's own length (see Length and Sections) stay dark and do not respond.
- If the part you are looking at does not exist yet (a new pattern has only its 1st Part), the first STEP press creates it at 16 steps and enters the hit. This is how a pattern grows to 32 steps.
- For accents, set Instrument Select to AC and write them like any voice.
- Patterns are saved when you stop and when you turn the Mode Dial.
Step Number and Pre-Scale
Mode Dial at 1ST PART or 2ND PART
Step Number
Each part plays from 1 to 16 steps. The 1st Part and 2nd Part play one after the other, so a 12-step 1st Part and an 8-step 2nd Part make a 20-step measure. Set the step number with the LENGTH tool:
- Hold CLEAR and press STEP 1 (LENGTH). Release CLEAR.
- Press the STEP key for the number of steps you want. Its LED lights.
- Tap CLEAR to close the tool.
Pre-Scale
Pre-Scale sets how many steps make one beat. The value is stored in the pattern, so the dial only changes a pattern when you commit it: turn the dial, then tap CLEAR. A CLEAR tap only commits if the dial has moved since the last commit, so a stray tap cannot change the timing.
| Pre-Scale | Steps per beat | Use |
|---|---|---|
| 1 | 3 | Eighth-note triplets |
| 2 | 6 | Sixteenth-note triplets |
| 3 | 4 | Sixteenth notes (new patterns start here) |
| 4 | 8 | Thirty-second notes |
Tap Write
Mode Dial at 1ST PART or 2ND PART, running
While the pattern runs, press TAP to put the selected instrument on the step that is playing. Play a part in by hand instead of placing it.
Intro, Fill In and Variations
Mode Dial at MANUAL PLAY
Press STEP 13, 14, 15 or 16 to choose which intro / fill in pattern TAP uses. This does not change the rhythm that is playing.
| Action | Result |
|---|---|
| TAP while stopped | Arms the intro: it plays once before the rhythm when you start. Press again to cancel. The intro LED flashes while armed. |
| TAP while running | The next measure is the fill. During the first beat of a measure, that measure becomes the fill, heard from the second beat. |
| FILL IN pedal (rear jack) | Arms the intro or plays a fill, as TAP does here. The pedal does this in every mode, including the write modes. |
| Auto Fill In at 16, 12, 8, 4 or 2 | Every Nth measure is a fill. Fills you play count toward N; the intro does not. |
Intro/Fill Variation chooses memory A or B of the intro / fill pattern. With Basic Variation on AB the rhythm alternates A and B every measure and keeps alternating through fills.
Panel Lamps
The Basic Variation lamp shows the memory that is actually playing, so it changes with the sound at the measure line, not when you turn the dial. While running, the 1st / 2nd Part lamp shows the part that is playing; while stopped it shows the part you are editing.
Clearing Patterns
Mode Dial at PATTERN CLEAR
Erase a Whole Pattern
The LEDs show which slots hold data, with the selected slot shown inverted. With the machine stopped, press the STEP key of the slot, then tap CLEAR. Basic Variation decides what is erased: A or B erases that memory, AB erases both. This cannot be undone.
Chase Delete
While running, hold CLEAR: the selected instrument's hits are erased as the playhead passes them. Release CLEAR to stop erasing.
The CLEAR Key and the Tool Map
Mode Dial at 1ST PART, 2ND PART or MANUAL PLAY
Press and hold CLEAR: the step LEDs show the tool map straight away. Press a STEP key to open that tool, then release CLEAR. STEP 16 opens the config menu. Step 15 is unused and stays dark.
| Step | Tool | Step | Tool |
|---|---|---|---|
| 1 | Length & Pre-Scale | 9 | Reslice |
| 2 | Swing | 10 | Arp |
| 3 | Copy / Paste | 11 | Direction |
| 4 | Transform | 12 | Generate |
| 5 | Probability | 13 | Save |
| 6 | Ratchet | 14 | Section |
| 7 | Polymeter | 15 | (unused) |
| 8 | Mute | 16 | Config menu |
- While a tool is open, the STEP keys and TAP belong to it only, and the LEDs show its current setting. The FILL IN pedal still plays fills.
- Hold CLEAR again to see the map: the open tool's LED blinks.
- Tap CLEAR (or press and release it without a step) to close the tool. Turning the Mode Dial also closes it.
- TAP is the second key inside some tools and never needs holding. In Length, Polymeter and Direction one press switches the tool's mode, and the LEDs blink in time while the second mode is on. In Probability and Ratchet it clears settings.
- Unless a tool says otherwise, it works on the instrument on Instrument Select, in the 16 steps on display.
Length and Sections
CLEAR + STEP 1 (Length), CLEAR + STEP 14 (Section)
Four Sections, up to 64 Steps
A pattern has four sections of up to 16 steps. Sections 1 and 2 are the 1st Part and 2nd Part; sections 3 and 4 extend the pattern to 64 steps. The sections play in order and any section of length 0 is skipped. New patterns have only section 1.
Length Tool
The Length tool has two modes, switched with TAP.
| Mode | STEP key n |
|---|---|
| Section length (LEDs steady) | Sets the displayed section to n steps. Pressing the length a section already has deletes that section (sets it to 0); section 1 cannot be deleted. |
| Voice length (LEDs blink) | Gives the selected instrument its own loop length, counted across all sections: STEP 4 in section 2 means 20 steps. Pressing the current voice length again removes it. |
A voice with its own length loops on its own cycle against the rest of the pattern. Steps beyond it go dark in the write display. Whether that loop restarts with each measure or runs freely is set in the Polymeter tool.
Pre-Scale from the Length tool
With Length open, hold CLEAR and turn the Pre-Scale dial. In section length mode the new value is committed to the pattern. In voice length mode it gives the selected instrument its own pre-scale, so that voice plays at its own rate between the pattern's steps; turning to the value the voice already has removes it.
Section Tool
STEP 1–4 choose which section the STEP keys and LEDs show. While the tool is open, the Pre-Scale dial also selects the section. The section you choose stays on display after you close the tool, so you can go back to normal writing in section 3 or 4. Turning the Mode Dial returns to section 1 (1ST PART) or 2 (2ND PART). Pressing a step in a section that does not exist yet creates it at 16 steps.
Swing and Direction
CLEAR + STEP 2 (Swing), CLEAR + STEP 11 (Direction)
Swing
STEP 1–16 set the pattern's swing. STEP 1 is none and STEP 16 is the most, a little under half a step. Swing lengthens each odd step and shortens the next by the same amount, so the tempo does not change. Saved with the pattern.
Direction
| Step | Direction |
|---|---|
| 1 | Forward |
| 2 | Backward |
| 3 | Random |
| 4 | Ping-pong (forward, then backward) |
With STEP 16 lit, STEP 1–4 set the direction of the whole pattern. Press TAP and the LEDs blink: now STEP 1–4 set the selected instrument's own direction. Pressing the direction it already has returns it to the pattern direction. Both are saved with the pattern.
Probability and Ratchet
CLEAR + STEP 5 (Probability), CLEAR + STEP 6 (Ratchet)
Both tools work in two stages. First the LEDs show the instrument's hits, and the steps that already carry a setting blink. Press a step to pick it. The LEDs then show that step's value as a bar; press a STEP key to set it, and the tool goes back to the first stage.
Probability
Gives a hit a chance of playing. After picking the step, STEP n makes it play n out of 16 times; STEP 16 makes it play every time again. Works on the accent track too.
Ratchet
Repeats a hit inside its step. After picking the step, the STEP number is the number of hits: STEP 1 is a single hit (no ratchet), STEP 2, 3 and 4 give 2, 3 or 4 evenly spaced hits; higher keys also give 4.
TAP in Both Tools
- First stage: TAP removes every probability (or ratchet) from the selected instrument.
- Second stage: TAP resets the picked step only.
Polymeter and Voice Settings
CLEAR + STEP 7 (Polymeter)
Polymeter decides what a voice with its own length does at the end of each measure.
| Key | Action |
|---|---|
| STEP 1–12 | One key per instrument, in Instrument Select order (STEP 1 is accent). Lit: the voice's loop runs freely across measures. Dark: it restarts with each measure. |
| STEP 15 | Sets every instrument in every pattern to restart with the measure. |
| STEP 16 | Master polymeter: sets every instrument in every pattern to run freely. Lit while on; press again to turn it off. |
| TAP | Switches to voice length mode, the same as in the Length tool. |
Copy, Transform, Generate, Save
Copy / Paste (STEP 3)
| Step | Action |
|---|---|
| 1 | Clear the current pattern |
| 2 | Copy the current pattern |
| 3 | Paste the copy over the current pattern |
The copy is kept until power-off, so you can paste it into another slot or memory.
Transform (STEP 4)
Works on the selected instrument's 16 steps in the displayed section. Probabilities and ratchets move with their hits.
| Step | Action |
|---|---|
| 1 | Shift every hit one step later (the last wraps to the first) |
| 2 | Shift every hit one step earlier |
| 3 | Reverse |
| 4 | Replace with random hits; the Pre-Scale dial sets the density (1 sparse, 4 dense) |
Generate (STEP 12)
STEP 1–4 fill the selected instrument's 16 steps in the displayed section with random hits, from sparse (STEP 1, about one step in six) to dense (STEP 4, about three in four). This replaces the hits and removes their probabilities and ratchets, so copy first if you want to go back.
Save (STEP 13)
STEP 1 saves all changes now. It only works while stopped, and its LED is lit only then. You rarely need it: patterns are also saved when you stop and when you turn the Mode Dial.
Mute, Reslice, Arp and Chains
Mute (STEP 8)
STEP 1–12 mute and unmute the instruments in Instrument Select order (STEP 1 is accent). Lit means muted. STEP 15 mutes every voice and leaves accent on; STEP 16 unmutes everything. Mutes are not saved with the pattern.
Reslice (STEP 9)
Hold a STEP key to loop that many steps from where the pattern is: hold STEP 4 for a four-step stutter, STEP 1 to repeat one step. Release and the pattern carries on where it would have been.
Arp (STEP 10)
Replaces the pattern with a sequence of single hits, one per step. Press STEP 2–12 to add instruments in the order you want them (STEP 1 adds a rest), up to 16 entries. STEP 16 clears the sequence. The sequence is also cleared when you close the tool or stop, so the pattern always comes back.
Chaining Patterns
Mode Dial at MANUAL PLAY
Hold one basic rhythm key (1–12) and press another: the slots from the first to the second play in order and loop, up to four slots. Chained and queued slots are lit; the playing one flashes. While running, a new chain starts at the end of the current one. Selecting a single rhythm ends the chain.
Rhythm Tracks
Mode Dial at PLAY
A rhythm track is a list of patterns, one per measure. There are 12 tracks of up to 64 measures. A track stores the slot of each measure, not the memory, so the Basic Variation dial still applies when it plays.
- Turn Instrument Select to the track number (1–12).
- Press START/STOP. The track plays from measure 1 and loops.
- A STEP key changes the next measure, for one pass only. The track is not changed.
- TAP or the FILL IN pedal during the first beat of a measure plays the fill in that measure. Auto Fill In and the intro are ignored, since the track already holds its fills.
- Moving Instrument Select while the track runs switches tracks at the end of the current track.
- A track recorded past 64 measures continues into the next track number, and plays on through it.
Recording and Editing Tracks
Mode Dial at COMPOSE, stopped
Tracks are recorded in real time: everything you play in MANUAL PLAY style is stored measure by measure.
| Operation | Result | Notes | |
|---|---|---|---|
| 1 | Instrument Select to the track number. | The old contents of the track are replaced. | |
| 2 | Tap CLEAR. | STEP 16 lights steadily: record is armed. | Tap again to disarm. |
| 3 | Select the first rhythm with a STEP key. Optionally press TAP to arm an intro. | ||
| 4 | Press START/STOP. | Recording starts. | |
| 5 | Select rhythms, play fills with TAP, use Auto Fill In. | Each measure is stored as it plays, including intros and fills. | A key or TAP in the first beat is stored for that measure. |
| 6 | Press START/STOP during the last measure you want. | Recording stops. | The measure you stop in is the last measure of the track. |
The track is recorded. Turn to PLAY to hear it.
Editing a Track
In COMPOSE, press START/STOP without arming record. The track plays, and each STEP key you press replaces the measure it lands in (the next measure, or the current one during its first beat). The track keeps its length.
MIDI
MIDI works over the MIDI IN and OUT jacks and over USB-C, where the 808 appears as “SuperOS-808”. Everything the 808 sends goes out on both.
Notes
Incoming Note On plays the voices. A velocity of 100 or more adds accent. The 808 sends its own hits on channel 1, at velocity 127 when accented and 96 otherwise.
| Note | Voice | Note | Voice |
|---|---|---|---|
| 36 | Bass Drum | 39 | Hand Clap |
| 37 | Rim Shot | 42 | Closed Hi-Hat |
| 38 | Snare Drum | 46 | Open Hi-Hat |
| 41 | Low Tom | 49 | Cymbal |
| 45 | Mid Tom | 56 | Cowbell |
| 48 | High Tom |
Pattern Select
Program Change 0–15 selects slots 1–16 in memory A, and 16–31 selects them in memory B. If Bank Select LSB (CC 32) has been sent as 0 or 1, it chooses A or B instead. The change follows the same timing as a STEP key. After a Program Change the Basic Variation dial is ignored until you move it.
Clock and Transport
With the clock source on MIDI, the 808 follows incoming MIDI clock and Start, Continue and Stop. If the clock stops for about a third of a second, the panel tempo and START/STOP take over again. Clock is taken from one input at a time, so a source sending to both USB and the MIDI jack does not double the tempo. Incoming clock is smoothed against timing jitter.
When running on its own tempo the 808 sends MIDI clock, Start and Stop. In OUT mode incoming clock is also passed on to MIDI OUT.
Channel and Switches
The MIDI channel (config menu step 1 and 2) applies to incoming notes, program change and bank select. SysEx has no channel. Notes and SysEx can each be switched off in each direction from the config menu or the web editor's device settings.
Web Editor
The editor is at superos303.com/editor/808. It needs a desktop browser with Web MIDI. Connect over USB-C, or connect both MIDI IN and MIDI OUT, choose the ports and press Connect.
- The pattern grid shows all twelve instrument rows. Edits go both ways at once: click a cell and the step changes on the 808; press a step on the panel and the grid updates. The playing step is highlighted.
- Probability, ratchet, per-voice length and polymeter can be edited per step and per row.
- Patterns and tracks can be backed up to and loaded from files.
- Device settings, panel calibration and firmware updates are run from here too.
Pattern Storage
The 32 patterns, 12 tracks, settings and the panel calibration are stored on the CPU board. No battery is needed. Changes are saved when the sequencer stops, when you turn the Mode Dial, with the Save tool, and from the web editor. Nothing is written while the sequencer runs, so saving never interrupts playback. Switch off only while stopped, or recent edits may be lost.
FRAM Storage FRAM Edition
Panel Calibration
The 808's dials reach the CPU as coded values, and those codes can vary between machines. The firmware ships with a table measured on a real machine. If a dial selects the wrong thing on yours, calibrate it:
- Open the web editor and connect.
- Start Panel calibration in the editor, or press step 8 in the config menu.
- Follow the prompts: set each dial position and press each key as asked.
- Save. The table is stored on the board and used at every power-on.
Calibration only needs the STEP keys, CLEAR, START/STOP and the tempo, so it works even when the dials are reading wrongly.
Stock Firmware Mode
Some builds of the firmware can also run the original 1981 TR-808 program, so the machine behaves exactly as it did from the factory, with MIDI clock sync added. The original program is not included with superOS-808; this mode is only present on a build that was made with an image of the original program.
| To | Do this |
|---|---|
| Enter stock mode | Config menu, step 9. The machine restarts in stock mode and stays there at power-on. |
| Open the config menu in stock mode | Hold CLEAR and press TAP. The machine keeps playing; step 9 blinks to show you are in stock mode. Tap CLEAR to leave the menu. |
| Return to superOS-808 | In that menu, press step 9. |
| Force superOS-808 at power-on | Hold STEP 1 and STEP 16 while switching on. |
In stock mode, STEP entry lands the moment a key goes down, at any speed, and also works while stopped. Only the clock source and SysEx in settings apply in this mode. The web editor cannot edit patterns in stock mode.
Firmware Update
Updates are sent over MIDI or USB-C. The machine does not need to be opened.
| Operation | Result | Notes | |
|---|---|---|---|
| 1 | Back up your patterns and tracks from the web editor. | ||
| 2 | Hold STEP 1 while switching the 808 on. | STEP LEDs 1–4 blink twice, then STEP 1 stays lit: the update mode is waiting. | The editor's Enter bootloader button does the same over MIDI. |
| 3 | Send the .syx file from the editor's firmware panel. | STEP LEDs 1–4 light in turn while it loads. | Do not switch off. |
| 4 | Wait for the transfer to finish. | The machine starts the new firmware by itself. |
Quick Reference
| Operation | Result |
|---|---|
| CLEAR key | |
| Hold CLEAR (write modes, MANUAL PLAY) | Show the tool map |
| CLEAR + STEP 1–14 | Open that tool |
| CLEAR + STEP 16 | Config menu |
| Tap CLEAR | Close the tool or menu; with none open in a write mode, commit Pre-Scale |
| Tap CLEAR, PATTERN CLEAR, stopped | Erase the selected slot (Basic Variation picks A, B or both) |
| Hold CLEAR, PATTERN CLEAR, running | Chase delete |
| TAP and keys | |
| TAP, stopped | Arm or cancel the intro |
| TAP, running, MANUAL PLAY or tracks | Fill (in PLAY, only during the first beat of a measure) |
| TAP, running, write mode | Write the playing step |
| Hold one basic STEP key, press another | Chain up to four slots |
| Tracks | |
| Tap CLEAR, then START/STOP | Record a track |
| START/STOP in COMPOSE (without the PLAY/COMPOSE connection: tap CLEAR twice first) | Edit a track |
| Power-on | |
| Hold STEP 1 | Firmware update mode |
| Hold STEP 1 + STEP 16 | Force superOS-808 (builds with stock mode) |
| In stock mode, hold CLEAR + TAP | Config menu |
Specifications
- Patterns32 (16 slots × memories A and B), up to 64 steps each in four sections of up to 16
- Rhythm tracks12, up to 64 measures each
- Instruments11 voices and the accent track
- Saved per patternstep number per section, pre-scale, swing, pattern direction, per-voice length, polymeter, direction and pre-scale, step probability (up to 40 steps), ratchets of 2 to 4 hits (up to 16 steps)
- Performancemutes, reslice, arpeggiator, chains of up to four slots
- Timinginternal tempo, rear DIN sync, or MIDI clock (24 per quarter note)
- MIDIMIDI IN and OUT jacks and USB-C; notes in and out, program change and bank select, clock and transport, SysEx for the web editor and firmware updates
- StorageFRAM on the SuperOS CPU board v1.3 (FRAM Edition), internal flash on other boards (Standard Edition); no battery
- Updateover MIDI or USB-C